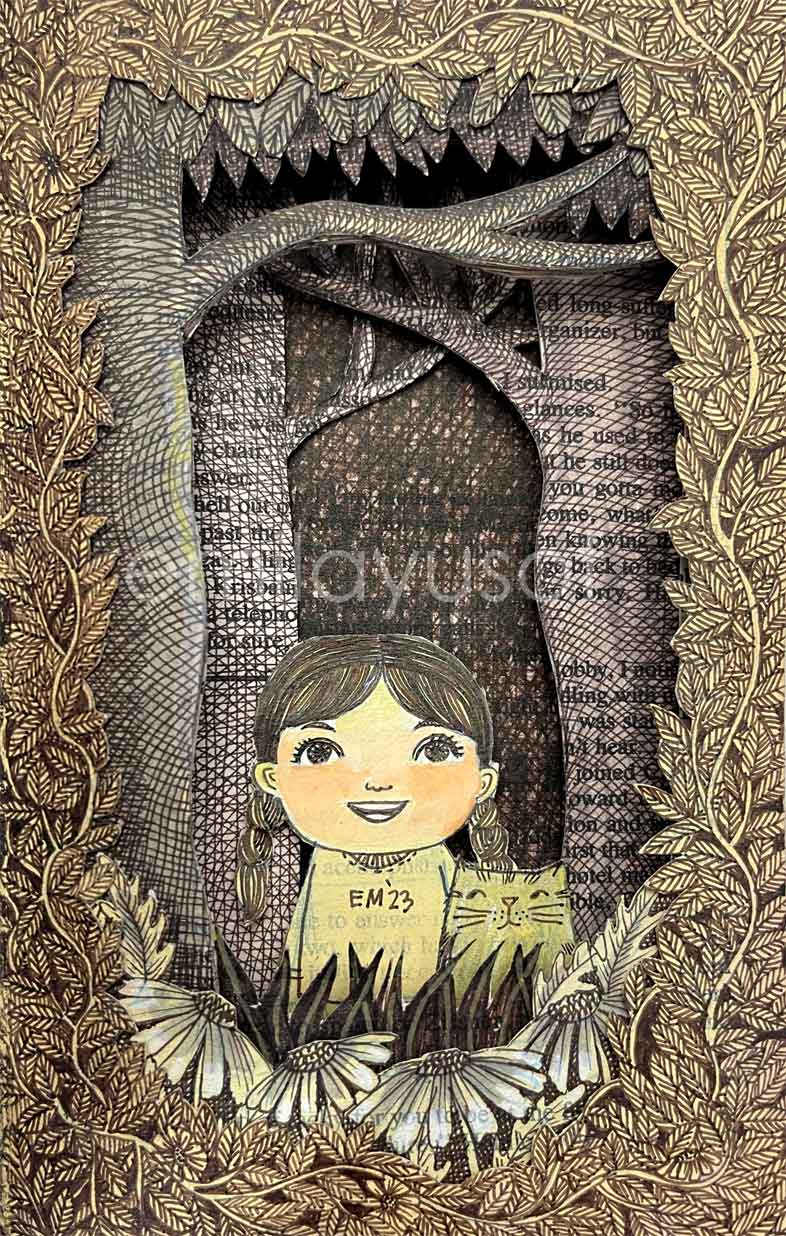
Crafting a Dimensional Tunnel Book Illustration from an Old Book
Unlocking the potential of an old book through artistic expression is a creative endeavour that brings new life to forgotten pages. One captivating project that combines imagination and skill is the creation of a tunnel book illustration. In this article, I am sharing the step-by-step process of transforming an aged book into a visually dynamic piece of art.
Selecting the book:
Before diving into the intricate process of creating a tunnel book illustration, the first crucial step is selecting the right book as your canvas. The choice between using an old book with its weathered charm or a new book with pristine pages sets the tone for your entire project. An old book may bring a sense of history and nostalgia to your artwork, while a new book offers a fresh start with crisp pages. Consider the size, depth, texture, and overall aesthetic of the book, as it will serve as the foundation for your tunnel book masterpiece. Once you’ve chosen the perfect book, you can proceed with the subsequent steps of planning your artwork and constructing the layers that will breathe life into its pages.
Artwork Planning:
Begin by determining the composition of your artwork. Decide how many layers you’ll have for the foreground, middle ground, and background. Plan the elements and their positioning within each layer.
Layer Construction:
Glue a few pages together for each layer. Adjust the number of pages depending on the element’s characteristics; for example, use more pages for the trunk to achieve the depth of a tree trunk.
Drawing the Foreground:
Start drawing on the first layer, which represents the foreground. Begin with a sketch to establish the composition and details, then refine it using ink to bring your vision to life.
Precision Cutting:
Carefully cut out the inside part of the drawn layer following the outlines. Precision cutting ensures that each layer fits seamlessly and contributes to the overall depth of the artwork.
Progress to Subsequent Layers:
Move on to the second layer and repeat the process. Sketch, ink, and cut, maintaining a meticulous approach for each layer. Continue this progression until you’ve completed all planned layers.
Glueing the Book or Framing:
After completing all layers, consider two finishing options. You can either glue the open side of the book together, create a self-contained tunnel book, or frame it directly in a frame with a depth that matches the book’s thickness. The choice depends on your preference for presentation.
End note:
Crafting a tunnel book illustration from a book is a labour of love that merges artistic intuition with hands-on skill. The careful planning, layer construction, and precise cutting result in a visually dynamic piece of art that transforms a neglected book into a captivating narrative. This creative process not only breathes new life into old pages but also showcases the endless possibilities that lie within the realm of book art.