Illustrating Children’s Picture Books with Paper Dioramas
In illustrating picture books, there exists a magical intersection where storytelling and artistry converge to create enchanting worlds for young minds. In this blog post, I am going to share about the creative journey that ventures beyond traditional illustrations; the tactile and imaginative realm of paper dioramas.
With paper diorama, we can create a universe where characters and scenes spring to life, each intricately shaped from the simplicity of paper. I am sharing here two examples of paper dioramas:
– ‘Pipa Gadis Kertas’ which I self-published in 2020 (soon will be re-published by DBP)
– ‘Aimi Tidak Murung Lagi’ self-published by Zanariah Salam, 2022.

Let’s dive into the steps to bring this whimsical vision to reality.
1. Conceptualize Your Story:
Begin by weaving a captivating narrative. Outline key scenes and characters that will form the heart of your picture book. Consider how the three-dimensional nature of paper dioramas can enhance the storytelling experience for young readers.
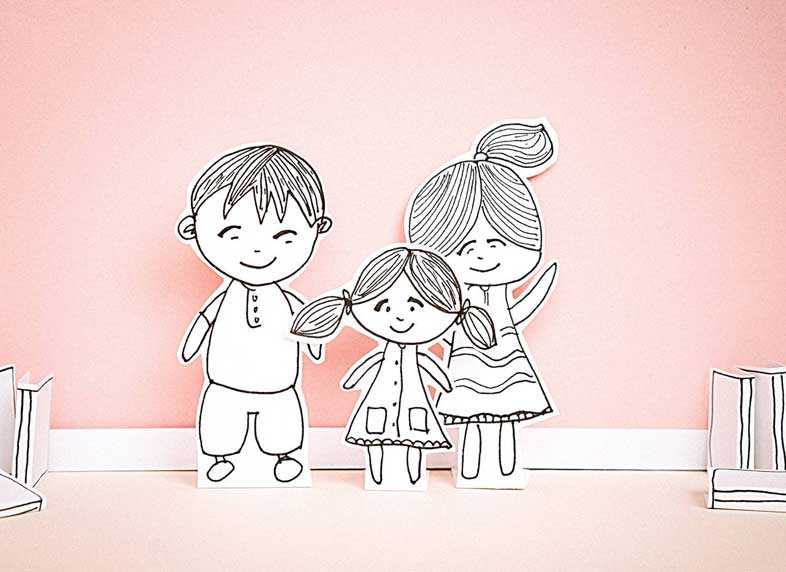
2. Design Characters and Elements:
Bring your characters to life with paper! Create delightful paper characters and elements that mirror the essence of your story. Pay attention to details, colours, and expressions that will captivate the imaginations of your young audience.
3. Choose Materials:
Select high-quality paper and materials to ensure the durability of your dioramas. Experiment with different textures and colours to make your illustrations visually appealing and engaging for children.
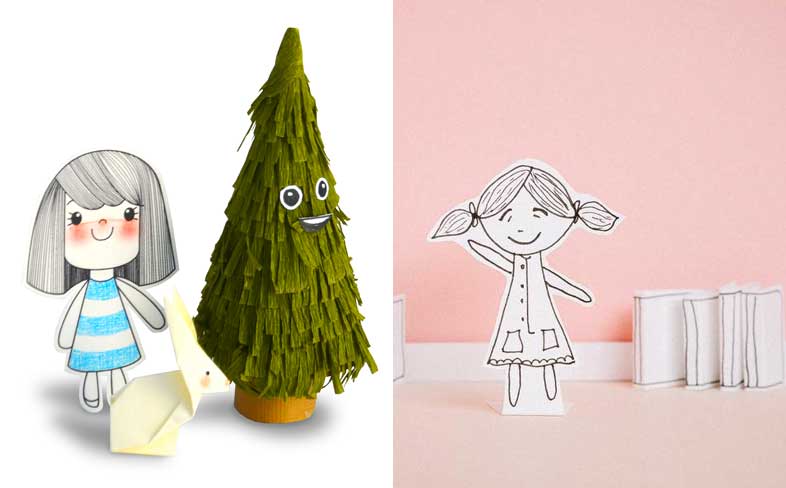
4. Create Diorama Settings and Elements:
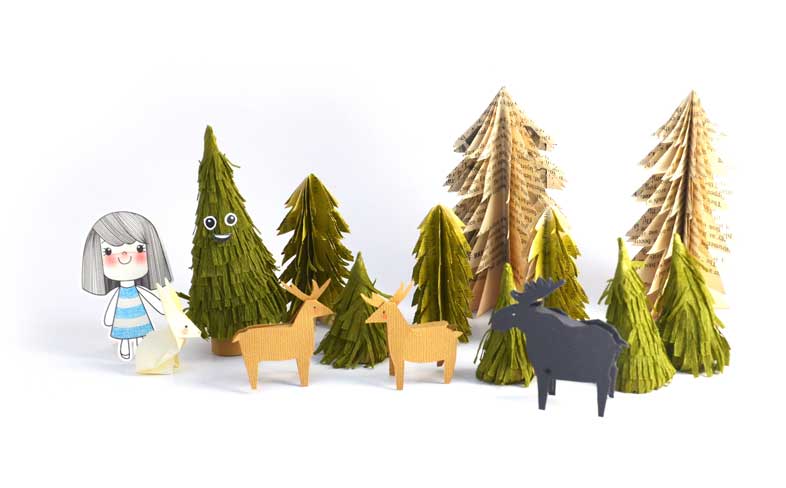
Build miniature worlds for your characters to inhabit. Craft three-dimensional dioramas that depict the various scenes from your story. Layer elements add depth and dimension, creating a tangible and immersive experience for readers.
Utilise techniques such as origami and paper cutting to breathe life into characters and scenes. Origami brings elegant simplicity, while paper cutting allows intricate detailing and layering techniques to add depth to your dioramas. Experiment with textures and colours to engage young readers in a sensory adventure. Assemble these crafted elements into enchanting scenes, capturing the essence of your narrative. Whether it’s rolling hills or charming houses, transform flat paper into dynamic, multidimensional landscapes.
5. Photograph the Dioramas:
Capture the essence of your paper creations by photographing them. Ensure consistent lighting to maintain a cohesive look. These images will form the visual backbone of your children’s picture book.
6. Digital Editing (if necessary):
Consider digital editing to enhance the images further. Adjust colours, contrast, or add any necessary text to create a polished and cohesive visual narrative.
7. Layout and Design:
If you are doing the layout on your own, plan the layout of your picture book, strategically placing text and images. Ensure a logical flow, where the illustrations seamlessly complement the unfolding story.
8. Test with Your Audience:
Before finalizing your masterpiece, share it with your target audience. Gather valuable feedback from children or parents to make any necessary adjustments, ensuring your picture book resonates with its intended audience.
9. Recapturing optional composition/angle:
If you need to adjust the composition, you can do so by rearranging the elements and photographing them again.
Conclusion:
By combining the art of crafting with storytelling, you can create a picture book that sparks the imagination and leaves a lasting impression on young minds. Let your creativity soar as you embark on this delightful journey of illustrating children’s stories with the charm of paper dioramas!