Art tips
-
How to practice life drawing from your living room
Don’t have a life drawing studio near you? No problem.
As an artist, one of the most trying things to get a grasp upon is the human form. Where endless hours have been spent in capturing gesture drawings and “real-world” situations, I have found that there is still a bit to be gained from just studying the human form in an artistic pose. And where I would encourage anyone who is a serious artist to seek out a life drawing session at an art studio, such may not be realistic. For those who do not have access to such a studio, do not fret. You can still get life drawing practice through the use of 3D models. You can also visit here to view more models. However, before you fire up your computer and start looking for a 3D model, here are a few things to consider.
Get an atomically correct model
There are a great deal of sites which are available on a number of sites. When you are looking for a model in which to practice your life drawing, it is crucial that you find a model that is proportionate and atomically correct. Where those which are not accustomed to an atomically correct may find that being presented with either male or female genitals, buttocks, and breast a bit unsettling, such is needed (not as a perverse application but as a means of understanding the muscles in how they correspond to each other). As live models would be presented in both clothed and nude models at most studios, it is advised that 3D models used for atomically studies be both clothed and nude.
 Credit image: www.cgtrader.com. Copyright: Aiman Akhtar.
Choose a high poly model
When you look to find a 3d model, first ensure that the model is not skewed but proportionate. Secondly, the model needs to be high poly. High polygons ensure that the model has an ample amount of detail. The more detail, the more the polygons the model will have. If you find that a model has low detail but a high polygon count, check to see how the model was constructed. In many cases a low detail and high polygon model will be the results of a conversion from another program which was done improperly, or it will be the result of errors within the model. Both of these are not what you will want in your 3D model.
Get a rigged model
A rigged model means that the model can be moved around and posed. This will require that you have a 3D program for the model, but the results you will get in being able to pose your model is priceless. By being able to move your rigged character, you can stimulate the various gestures and poses which you would get in a studio setting.
Draw as though you were in a studio
When I draw from a 3D model, especially a human model, I treat my drawing session just as though I would treat a studio session. This means that I set my computer up in an area that can be easily seen from my canvas. In some situations, I wire the computer to my television to allow for a larger viewing area. After I have the set up completed, I allot a certain amount of time for gestures and warm-up. One way in which you can mimic the time constraints of gesture poses is to set up various poses within the timeline of your 3D program. For example if your playback is 29.95 frames per second, you can put a different pose every 300 frames for 10 second gestures.
Once you have the warm up and gesture drawing pose your character as needed. This can be either a preset gesture on the character, or you can create a custom pose. The good thing about the 3D model is that you can zoom in on the model to get details on a particular muscle group. Just ensure that you do not change the angle.
Studio or 3D model
It is always advised that you try to get a live model when you draw. Whether you are attempting to draw wildlife or the human form, real models are always preferred. Yet, when you cannot get a live model the 3D model is clearly the alternative over pictures and static references. Again, ensure that you have a model that realistically proportioned, is rigged, and one that does not fit into the “perfect” mold (as most people have a bit of a flaw here or there). If using 3D models, ensure that you purchase various ethnics, ages, sexes, and weights to help with the diversification of your skills. It is also advised that you try different mediums (such as charcoal or pastel) when sketching so that you can further focus on the anatomy and less upon the pencil, paint or pen.
-
Four Expert Tips for Painting Wildlife
Painting pictures of wildlife is often one of the more difficult subjects to tackle. For many artists, there is a lot of planning and preparation which goes into creating the perfect wildlife pictures and getting every detail spot on. Whether you’re an artist who’s looking to brush up on your wildlife work or are about to try painting wildlife scenes for the first time, these top tips will help you to perfect your wildlife art and produce paintings which you’ll be forever proud of.
Use Real Life Subjects
When painting wildlife, there are so many more elements that need to be taken into consideration than just the animal or animals themselves. You should try to sketch and paint from real life as often as possible, as this will enable you to see how the animals interact in their natural habitat and create paintings that are as true to life as possible. If it’s not possible to paint and sketch from real life or you are worried about alerting the wildlife to your presence and scaring them away, you might want to consider the use of a trail camera, which you can use to record the wildlife in their natural habitat for a reference. See a guide to the best trail cameras here.
Refining Your Sketches
It’s always tempting to skip straight to the painting stage after you’re drawn up a sketch, however experts say that it always pays off later on down the line to refine and re-refine your sketches before you let any paint touch the paper. You should begin by blocking with basic shapes in several stages and try to represent as much of the animal as possible with these shapes. Then, art experts recommend starting with a focal point, for example an eye, and measuring vital points from this with your pencil. Next, you should refine the sketch, ensuring that the shapes of limbs and facial features are accurate, along with checking vertical and horizontal alignments. This provides you with a good framework for painting or developing layers with confidence.
Stay Stocked Up
If you are observing and painting wildlife from real life, it’s important to ensure that you’re fully stocked up on all the art supplies that you will need and more. When you’re painting wildlife, time is definitely something which is not only your side and you can’t afford to have to run back home for supplies if you run out. Overstocking, rather than understocking, on the equipment that you take with you is definitely the best situation to be in.
Planning
Last but not least, careful planning is essential when you’re going to create a wildlife painting. Deciding which animals you are going to paint, where you are going to find references, and the materials which you are going to use is important. When you are constructing a scene, there are many different elements which should be considered, which is why experts recommend planning your scene on tracing paper first so that you can make any changes if necessary.
Wildlife is a great branch of art that every artist should try at least once!
-
So you wanna draw: 5 – Draw your toothbrush
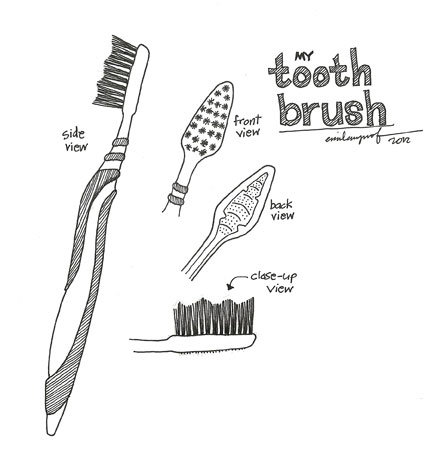
When I took the toothbrush from the bathroom, my husband gave that are-you-running-out-of-things-to-draw look. But I told him without him asking the question, that toothbrush is an interesting subject to draw; the shape, the brush and the details.
Now I want you to go and take your toothbrush. Observe it, turn them around. Find a good angle that you think is easier to draw. You can try to draw it from many angles like what I did above. For a stay-at-home mom, I know this subject is reachable anytime but for those who are working, try to bring your own toothbrush in your handbag. When nobody is watching, take it out and draw. If somebody comes and laugh at you, just tell them that you carry your toothbrush all the time to take care of your teeth after having lunch. Also ask them whether they do that too. It’s normal you know.
You can copy my drawing if you like, I hope it’s big enough for you to use as reference. Have a great week and happy drawing!
-
So you wanna draw: 4 – Draw your laptop
I have been busy doing mock-up for a book that I want to propose to a publisher on Monday as well as a drawing that will leave for New Zealand and a header for a blog. Hence, the few days hiatus.
Thank you to Syug who waited patiently for this exercise. I am pretty amazed that she is quite good in drawing. Keep it up Syuq, love all your drawings! Visit Syuq to see her drawings: http://dikekelisa.blogspot.com and please leave her some comments.
OK let’s get on with our practice. It’s pretty much on what we see around us. Today, let’s draw our laptop/computer. You see it everyday, right? So it’s quite easy to draw. Take your sketchbook and other tools and sit in front of your laptop. Draw the shape first with all the details later. Details are very important to visualise what we are trying to draw. With only the shape, it can be a blender or a baggy blouse with no collar.

You don’t really have to be precise on the number of keys on the keyboard as the exact details with make you go rubbing the eraser many times over.
Ok? So get going. Till I figure out what to draw next. Have fun and happy weekend.
Here’s a cover song by Angus and Julia Stone that I have been listening while drawing.
-
So you wanna draw: 3 – Draw your keys
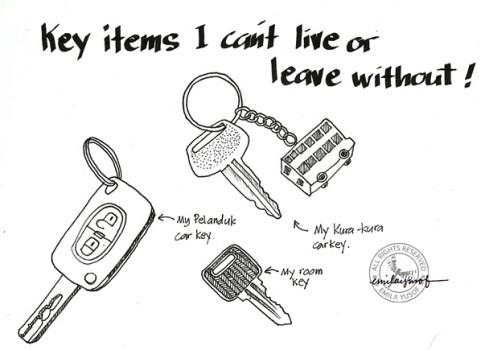
Are you ready for drawing exercise #3? Get your tools ready. I want you to take your keys and place it in front of you. This is more like a challenge because I don’t want you to draw another subject. Keys only.
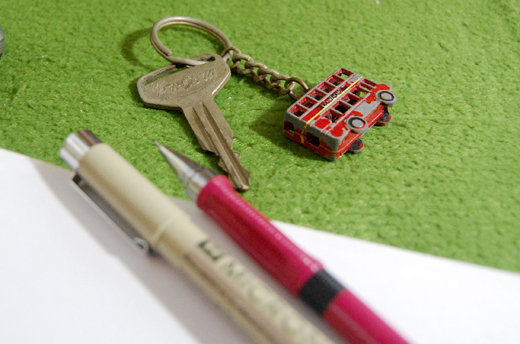
Observe the key and draw the important shapes first. You put in the details later. Never mind if the ring is not round. One thing that is great about art is you don’t have to be perfect. The imperfectness makes the art.
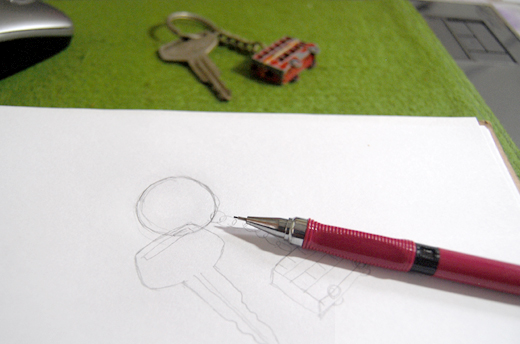
Draw any keys you can find. Observe the details and put it down. Trace with pen and erase the pencil sketch. Write down anything you like; bold being your first impression or thoughts on keys. Why do you need to write when all you want is draw? It’s a way of keeping track of your thought about things you draw and the emotion you are having that time. It can be, “I love this key so much because it is the key of my very first car which now resides in a big junkyard waiting its turn to be demolished. Sob, Sob. – 31 Jan 2012” <– put the date as well.
Yeah, this can be a sketch journal as well.
Have fun! Don’t forget to show me your drawings!
-
So you wanna draw: 2-Draw anything in front of you
If you follow the first drawing exercise, that means you are very interested in improving your drawing skill. Drawing exercise can also increase your creativity because it uses both your left and right brain. Skill can be improved if you really have the passion in doing it. Forget about those who were born creative, as far as I know they also learn how to draw from scratch. Nobody can draw at the age of 1 day. ;P
This tutorial is quite easy because you draw from what you see. I’ll cover the imaginative part after I finish with this one. I think I will have about maybe 20 to 25 entries before I reach to that part.
So are you ready for the second drawing exercise? Ok get your tools ready.
Now look in front of you. What do you see? A wall? haha, don’t la stare at the wall. Go to your working/writing-table. As for me, I spend most of my time here. I see my laptop, I see the mouse, I see the brushes/pencils, I see wall also, I see wall hook, I see my memo board with magnets, I see books, I see many things. My table is not that organise. Unkempt is the word. So many things on my table. But two things I wanna draw are the mouse and a mug (treated as pencil stand) that holds my brushes, ruler, pen and pencil.
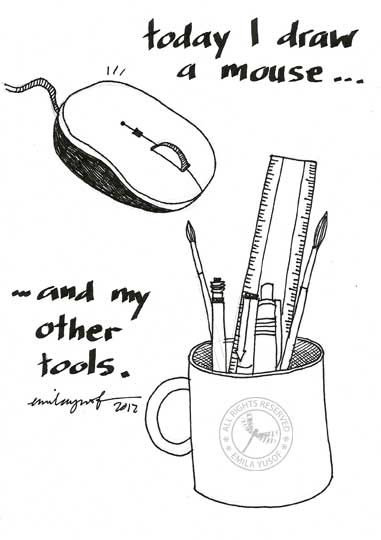
Now start drawing. If you only have wall in front of you, draw the above. I use mechanical pencil first and use pen later. I use calligraphy pen for the notes. Don’t you love using calligraphy pen? It brings out the best in your writing.
Do you have a blog? If you do, post what you draw on your blog and let me know the link. I’ll link to this page. I am excited to see what you draw.
So do you really want to see my table?
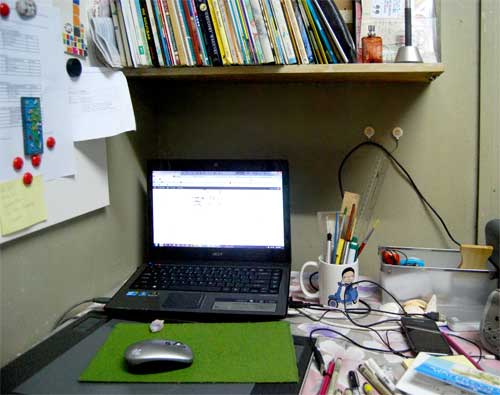
I told you it’s unkempt.
-
So you wanna draw: 1-Draw your tools
You watch others draw and they inspire you to draw but you have no clue how to start.
So I am going to tell you how to start. My way.
You need:
- Sketchbook. Buy cheap one for a start.
- Mechanical pencil with eraser tip (preferably refillable). The lead width is up to you. It can be 0.5mm or 0.7mm 2b leaded. Buy 2 for your stock.
- Pen with 0.3mm (or 0.4mm) line width. You can also buy 0.1mm if you have smaller sketchbook.
- Calligraphy pen with at least 1.0mm line width. This is for title or bold caption writing.
So what do you draw on your very first page? Your title page, of course! Be creative in creating your own title. If you have no idea, just copy mine below. I use 0.3mm pen for the first one and calligraphy 1.0mm for the second one. But please don’t draw the watermark, haha. I have to put it there because I had previous issues with image thieves.
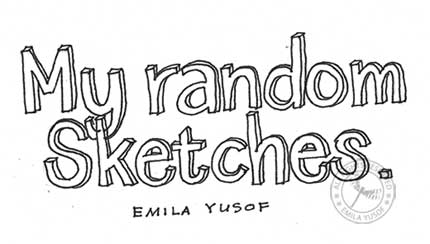
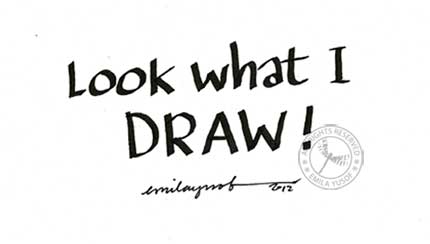
For the first title option, draw with pencil first. I am not the confident type to just draw with pen so I draw with pencil first, so it is okay for you to do the same. After you think it’s good enough, draw with pen. Then erase the pencil line. You can color the title with color pencil. Don’t use watercolor as cheap sketchbook usually comes in 70gsm paper. Quite thin. But let it just be pen for the time being.
For the second title option, I just write it not using pencil. Do not feel afraid that you will make a mistake, nobody is going to judge you. Anything you draw or write is good enough. Cacing kerawit or cakar ayam ke, its okay.
Then on the next page, your first exercise is to draw your tools. How to draw the pencil when you are going to draw with the pencil? You, silly. Didn’t I say, buy 2? So how to draw the sketchbook when you are going to draw in it. Ok, since you have only one sketch book, take any book from your bookshelf. Compose all in front of you and start drawing. If not, just copy what I draw below.
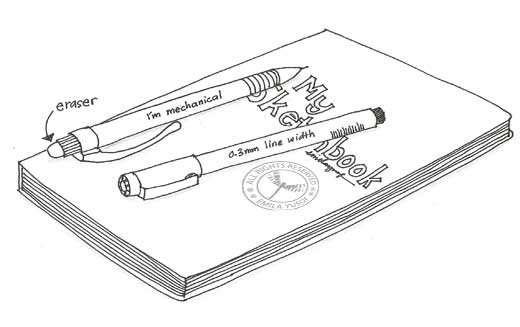
Yeah, do it many times over until you like what draw. Learning to draw is like that. You draw and you erase. You draw and you erase. We are not professionals here, we just want to learn how to draw. Practise makes perfect. So get going, no excuse.
Good luck and have fun! Til exercise 2!
P/s Do leave me a comment or two. I am beginning to think I am talking to myself.

