Tutorial: 004 Proportion
Hello everybody! It’s tutorial time!
I really hope somebody is following my tutorial. Come on, show me a sign already! If you just bumped into my tutorial, worry not, you can always start from my first tutorial.

This tutorial is in cooperation with Denaihati.com
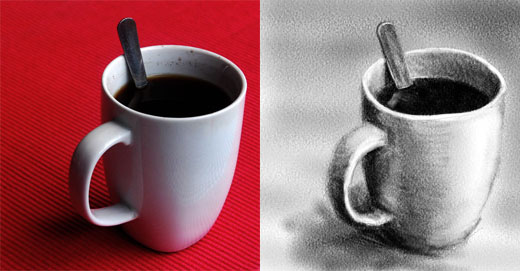
OK, before I talk more about shades, lets take a look back to our last tutorial. Remember the steps?.
1) draw the faint outline
2) start shading the darkest part
3) add background shade and enhance the overall shade
4) recover the bright area with eraser

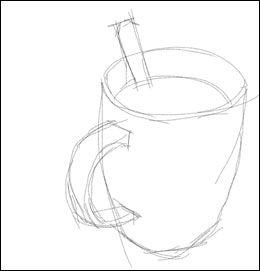
Few friends of mine tried my tutorial and they told me that they couldn’t get it right the first time; to successfully shaping the outline. Everything was out of proportion (cup handle too small, too big, cup too tall, too fat…. etc.) And by the time they got the shapes right, their drawing papers were already in bad shape. To be frank, this happens to me occasionally too. It’s not unusual to have 3 or 4 pieces of drawing papers before I really get it right.
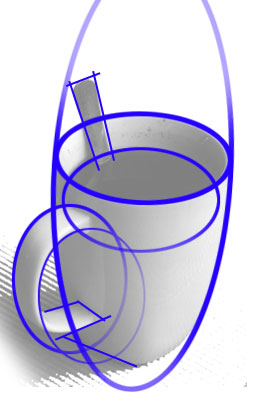
OK, let’s tackle this problem. In the case of this particular subject, what I see generally, is a set of an overlapping ovals.

Just look at the relative sizes, angle and position to each other. Look at it as a correlation of shapes instead of a cup of coffee and register it in your mind. This trick might help you get accurate proportion.
Let’s take a look at one more situation here and how I look at it in basic shapes and line. (blue line)

Maybe your observation is different than me and saw more squares or triangles than ovals. Well, its your call.
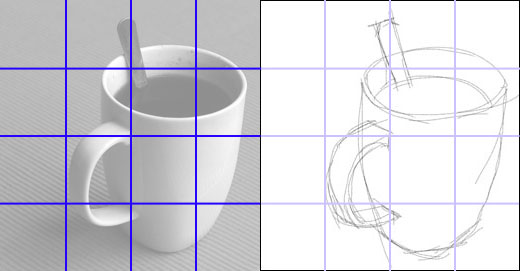
If you draw from picture, grid line might help you achieve the right positioning and proportion.

This technique is also a good way to scale up your painting.
Ok, that’s it for tutorial 004. Now, go and get a piece of paper and draw.
If you feel like sharing your drawing, post it on your blog and let me know. I will feature it here.
4 Comments
zezebel
I am searching for my paper and pencil now. ehehehehe….
Thank you for sharing.
emila
oh ok! glad you are starting now!
Joan Y
Emila, this is wonderful! You’re so generous with your talents! I think you’re great!
emila
thanks joan! i love to share!